Remove a screenshot border and check the four trim measurements
Admin ·
Screenshots can include a strip of matching background along each edge. Take a PNG of a mock interface with unequal borders and check the measured crop before styling a fresh copy.
Check each side of the 272 × 168 trimmed image
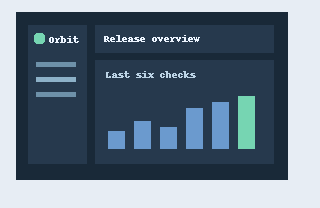
Select Load screenshot example and leave Trim border automatically on. Enter 0 for Trim tolerance to match the sample’s uniform border exactly. The original measures 320 × 208 pixels. The tool reports 16 px left, 12 px top, 32 px right and 28 px bottom.
Choose None for Decorative frame, enter 0 px of padding and keep the corner radius at 0. Download the 272 × 168 PNG. Open it at full size and check that the colored content reaches all four edges.
Adjust the tolerance before removing a faint edge
The top-left pixel supplies the reference. Increasing tolerance groups more similar pixels with that reference. A faint line or pale edge label can become part of the border if its color is close enough.
Compare the original with the result as you adjust the number. If the sample color comes from real content or the screenshot has different colors on different sides, turn automatic trim off and use the Image Cropper to choose the edges.
Make a browser-framed copy with a gradient
Turn automatic trim off, choose Browser and set 24 px of padding and 18 px of corner radius. Choose Two-color gradient, select Evening sky and enable Add shadow. The live output measures 384 × 297 pixels.
Check that the screenshot still shows its outer strip and that the browser bar sits above it. Download the styled PNG separately. With Decorative frame set to None and a Transparent backdrop, rounded corners can remain transparent.
WHATWG HTML standard, canvas bitmap serializationW3C PNG specification, alpha channel and transparency
Common questions
What happens when the full image matches the border?
The full image is kept and the measurements show zero pixels removed. Lower the tolerance to check for subtle differences.
Does the exported PNG keep source text chunks and EXIF?
The tool renders the decoded image to a fresh canvas and encodes a new PNG. Text and EXIF chunks from the original file are dropped. Any private details visible in the pixels stay visible where those pixels are retained.